Relatively few people buy stand-alone scanners these days unless they work with printed documents, photos, or photographic negatives, and most financial, medical, and legal documents show up in digital form—but not all. That’s particularly true if you have kids in school and are tasked with endlessly filling out variations of the same form, by hand and often submitting as paper.
Apple has built in a scanner into Notes for a few releases, which lets you capture pages or images as documents, and then edit them directly (via the embedded Markup tool) or export them as PDF to fill in forms or make other modifications.
Based on reader email and online questions in forums, relatively few people seem aware of the power hidden away there. Like most iOS/iPadOS apps, Apple’s gradual improvements don’t overcome people’s memories of what didn’t work or what was omitted in earlier releases.
You can also upgrade to a third-party app if you need more advanced features than Notes provides, particularly in accessing text digitized via optical character recognition (OCR), and better editing and assembly of finished documents.
Scan with Notes
Notes provides an efficient, but not highly featured document scanner:
- Launch Notes.
- Create a new note or select an existing one.
- Tap the camera button and select Scan Documents.
- With the document beneath the camera, try to get it as level and square as possible. If the Auto setting is on (the word Auto appears in the upper-right corner), Notes captures a page whenever it detects a document. This lets you auto-scan by swapping out pages beneath the camera or pointing the camera at a series of pages. You can also tap the shutter button in Auto mode, or tap Auto to switch to Manual after which you must tap the shutter button to capture a document.
- In Auto mode, documents are captured and keystone correction applied. In Manual mode, you can adjust the corners of a document, and then tap Retake or Keep Scan. (Keystoning is the effect of a rectangle appearing to be a different shape when not captured—or projected as with a slide projector—absolutely squarely.)
- Continue scanning until all pages are captured.
- Tap Save. Notes attempts to extract some text at the top of the document to use as its title.
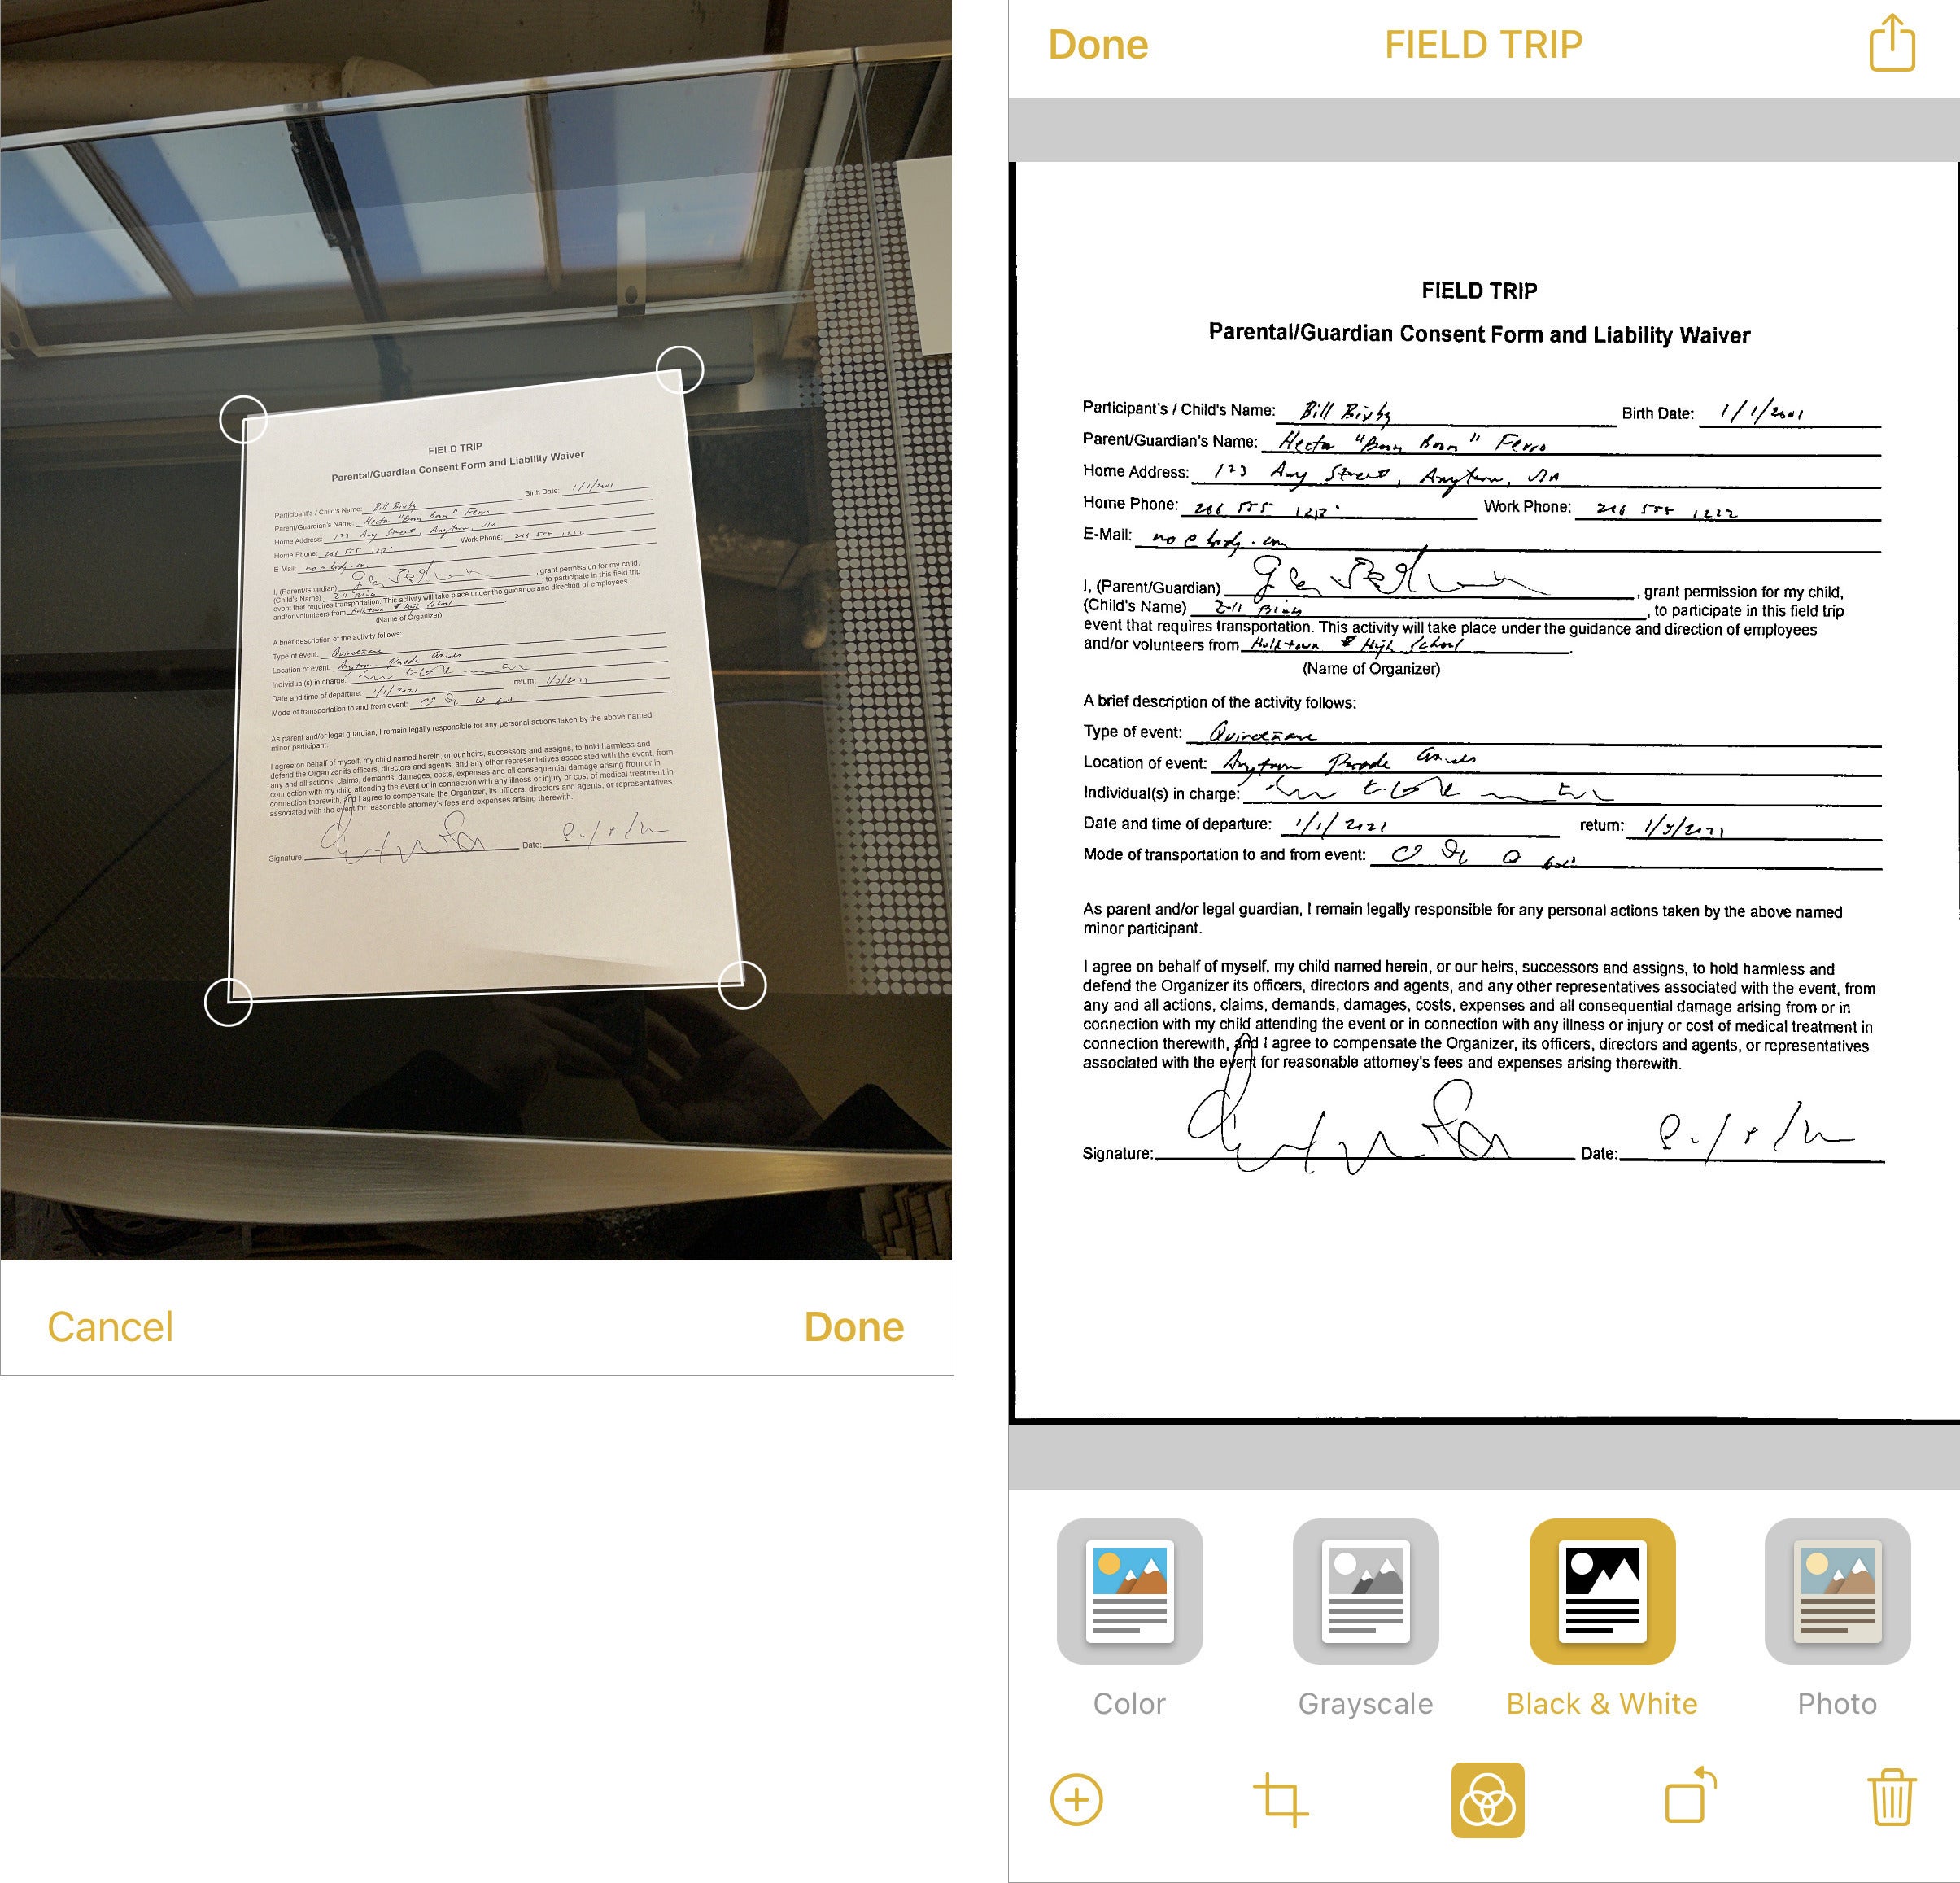
In step 4, you can also adjust colors captured, as well as choose a flash setting.
 IDG
IDGNotes automatically figures out where a document sits against a contrasting background (left). You can adjust a scan afterwards for color and other parameters (right).
Once a document is saved, you can tap it in the note, and then add additional pages, adjust cropping and colors, rotate it, and trash it.
You can also share it, including using Markup, which lets you use a previously stored signature or create a new one by tapping the + sign in the lower-right corner and then tapping Signature. Tap Done when finished to store the revised document page in Notes.
 IDG
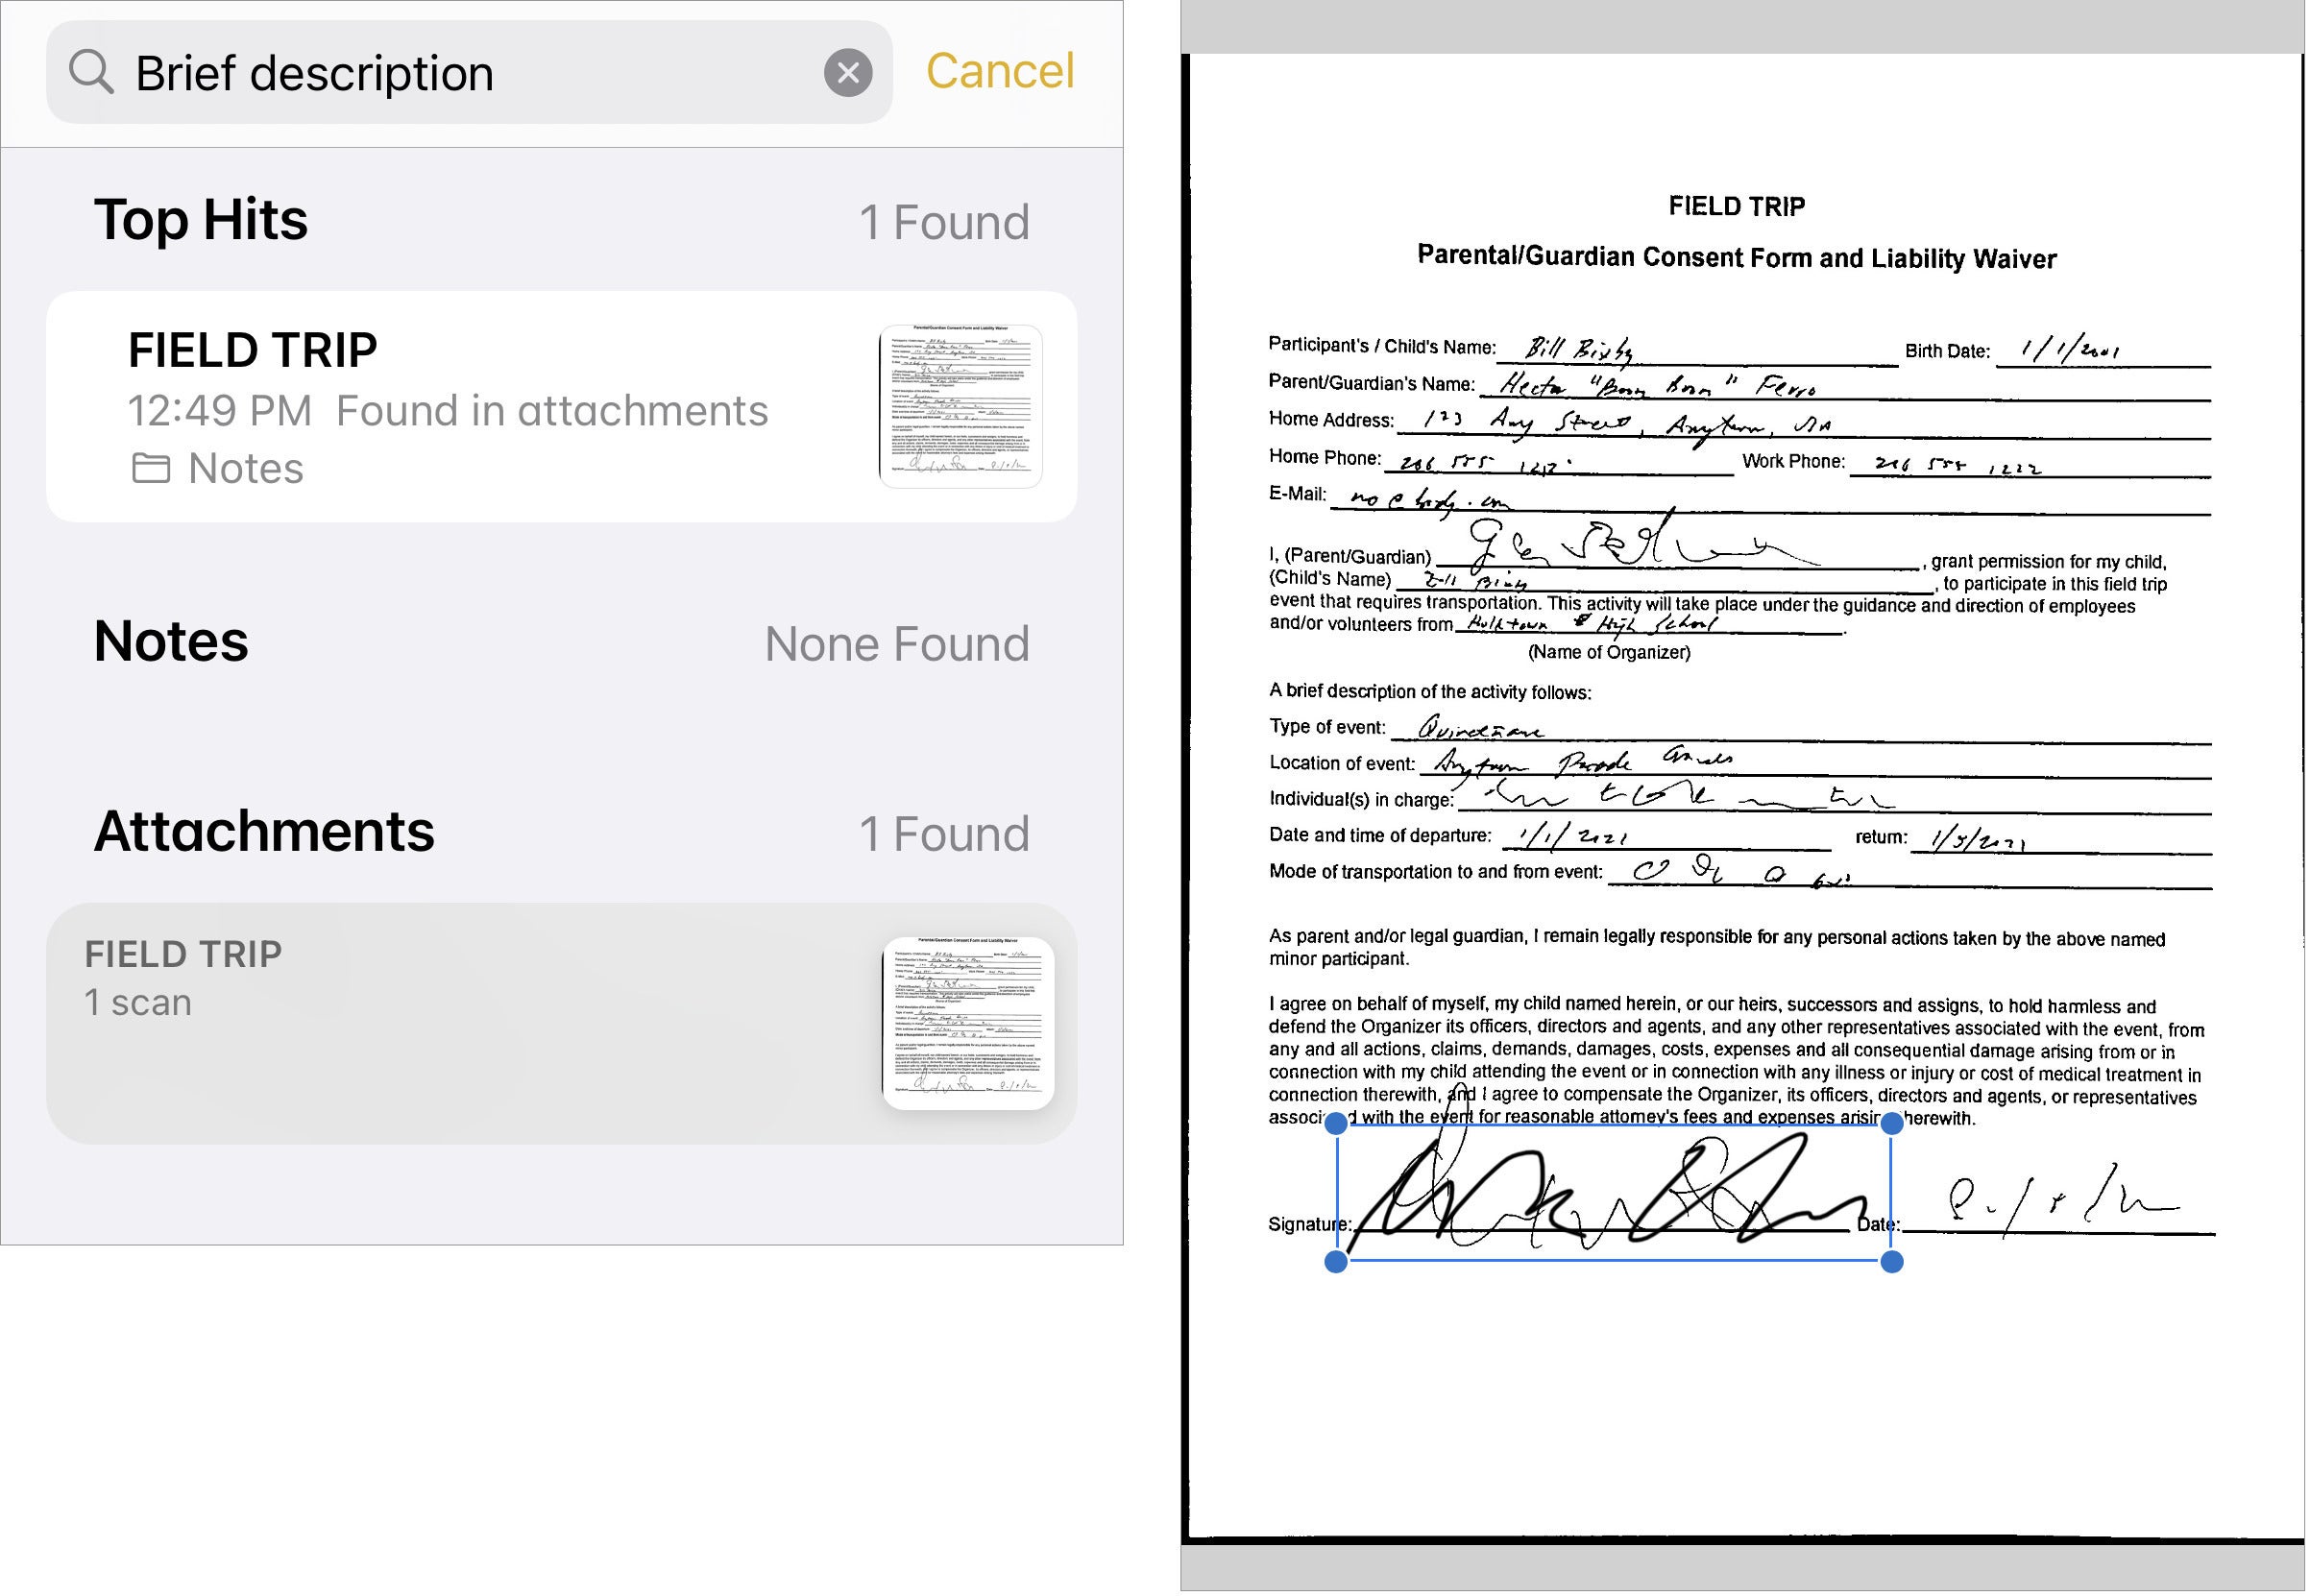
IDGYou can search on text recognized in the document (left). Apply a signature (right).
If you want to export the document, select it in Notes, then tap the Share button and select any available option. It’s always exported as a PDF. You can also open the same note in Notes for macOS, if you have iCloud sync enabled for Notes, where you can view and modify it, as well as export it as a PDF.
The contents of scanned documents are digitized, so you can search Notes for legible text on them. However, Apple doesn’t offer a way in iOS, iPadOS, or macOS to select that text or export a PDF with the text embedded in my testing. That requires a third-party app.
Scan with other software
Many iPhone and iPad scanning apps offer Notes’ base features plus additional ones. (Some scanning apps offering faxing, too, useful on rare occasions, but I was unable to find a combo scan-and-fax app that clearly disclosed fax pricing, even among well-reviewed apps.)
 IDG
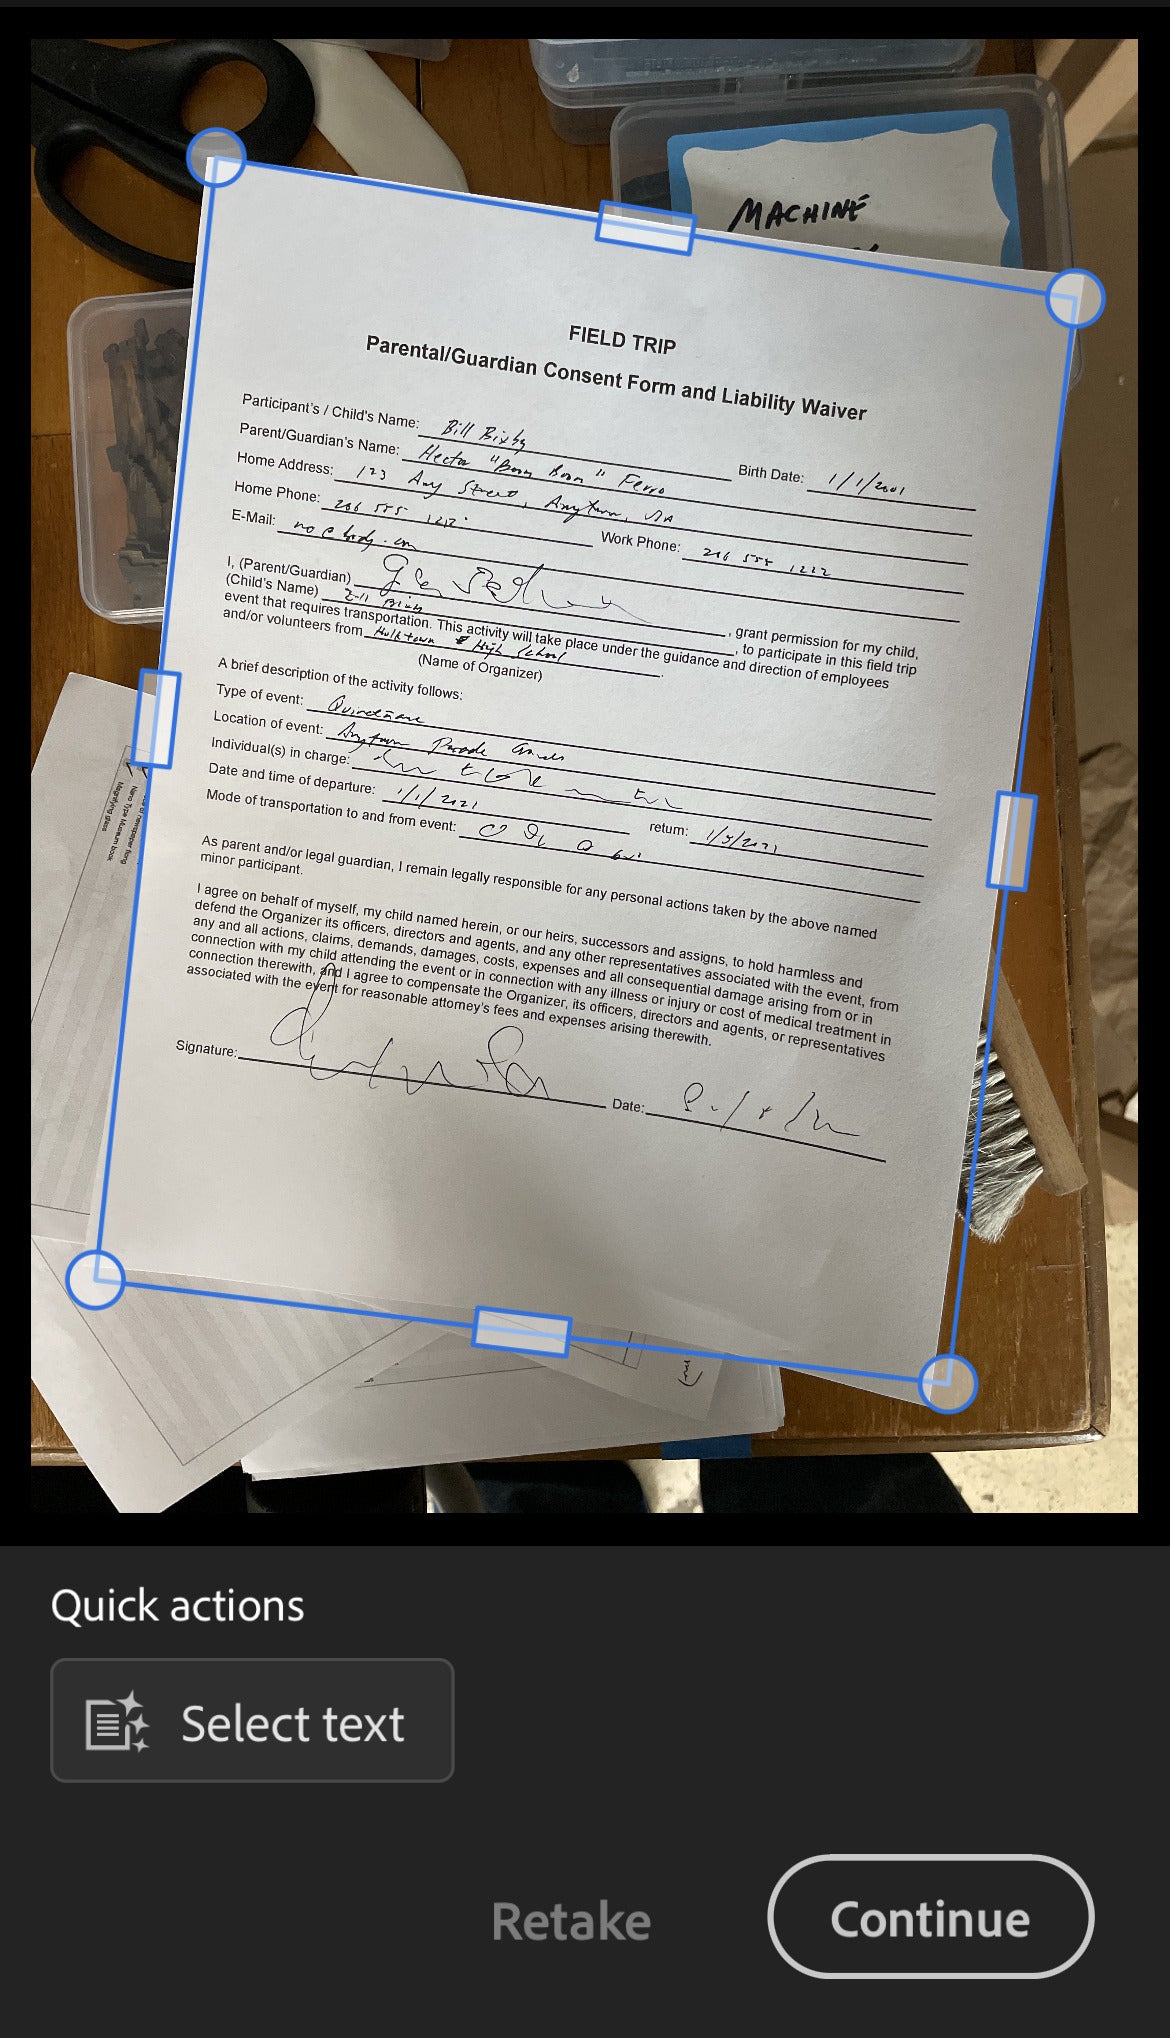
IDGAdobe’s scanning app offers similar controls, but more advanced refinement and export.
The most popular and full-featured of these apps comes from Adobe: Adobe Scan. In its free version, it lets you scan pages and export them in a form that also lets you simply copy the text out of the PDF, as in the Preview app and other PDF-reading apps.
For an in-app purchase price of $9.99 per month ($89.99 per year), or as an included part of a Creative Cloud subscription, you gain additional options for exporting in formats like Word, bundle pages into documents, and more advanced features. You only need these options if you handle a lot of documents, or if you’re scanning pages of a book or academic journal and want to have better control over creating the final document and extracting the text for better reading access.
Alternatives include Microsoft Office Lens, which is free, and independent of Microsoft Office, but works with the company’s apps and storage service. There’s also PDFPen from SmileOnMyMac, which I’ve used for years for its flexibility and the friendliness of its interface—and it’s a $6.99 one-time purchase.
Ask Mac 911
We’ve compiled a list of the questions we get asked most frequently along with answers and links to columns: read our super FAQ to see if your question is covered. If not, we’re always looking for new problems to solve! Email yours to [email protected]including screen captures as appropriate, and whether you want your full name used. Not every question will be answered, we don’t reply to email, and we cannot provide direct troubleshooting advice.
The post How to scan documents in Notes and third-party apps on iPhone and iPad appeared first on TechFans.